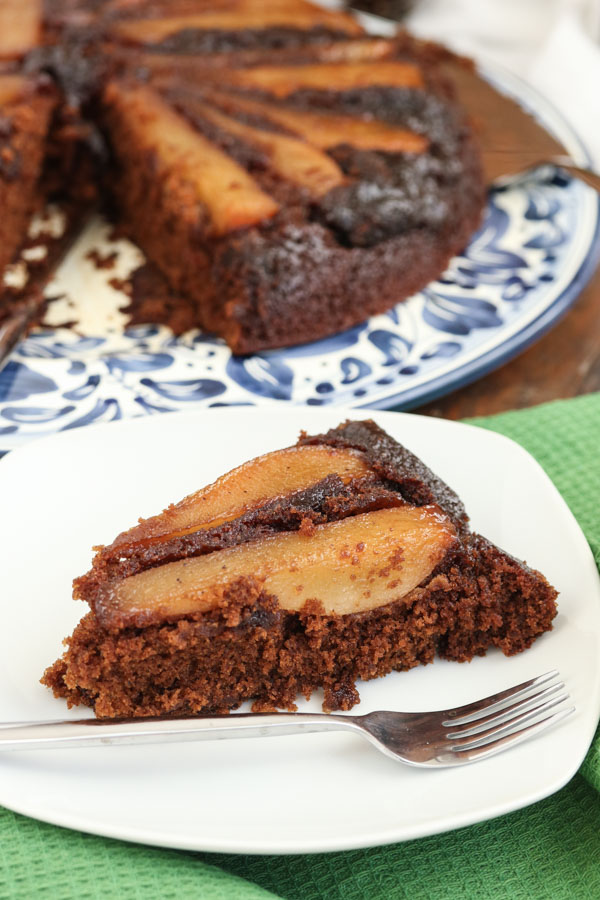
based on my paper printout (of course), i first made this upside-down pear gingerbread cake for christmas eve dinner in 2004. aaaaand i’ve made it basically every year since then (with the molasses splatters on the paper to prove it). it has turned into a bit of a christmas tradition, which started simply because the cake is just so tasty.
the cake itself is really moist (we really need a new word, at least for describing cake, that we don’t all hate…) and has a strong but not overwhelming molasses/ginger flavor (though really, i’m not sure i would ever find a cake *too* molasses-y or ginger-y…).
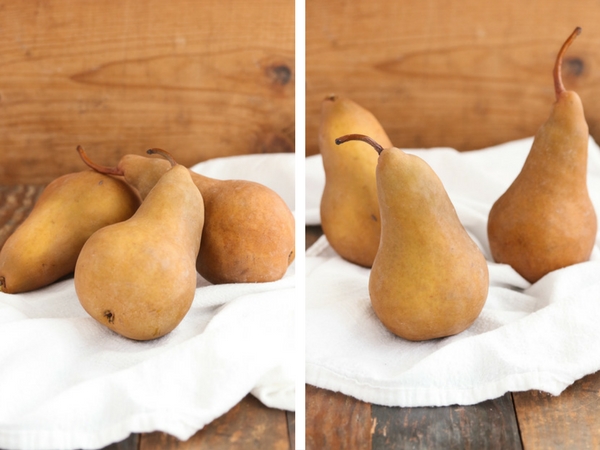
the pears make a delicious topping that further adds to the yummy texture of the cake. timing the ripeness of the pears is basically the most difficult part of making this cake. i put some tips in the notes below the recipe but basically, you want the flesh (another word that i don’t love to describe food…) right near the stem to yield just slightly when you press on it. by the time the whole pear feels soft on the outside, the inside is going to be yucky. i try to buy the pears a few days before i make this cake so that they have a few days to ripen, though i also include a tip below for ripening them faster.
the only other “tricky” part of making this cake is that you need a large skillet that can go in the oven. back in 2004, our pots and pans collection did not include such a thing so i followed the recipe’s suggestion and wrapped the plastic (not oven safe) handle in a double layer of aluminum foil and it worked just fine. i think oven safe pans are more common these days (at least they are in my kitchen…), so this may be a non-issue for you.
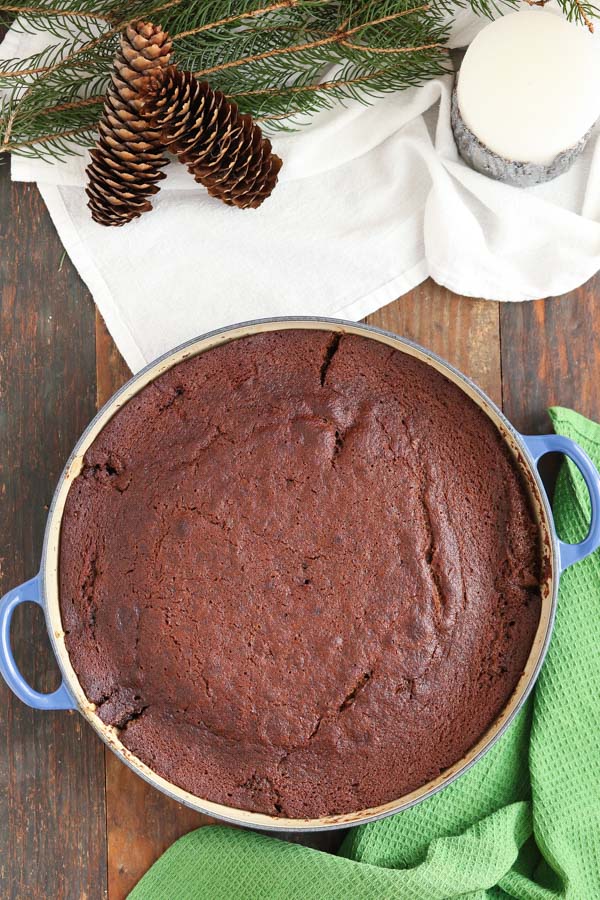
one of the fun things about this cake, besides how delicious it is, is that even though you know that ripening pears and finding a skillet is just about as difficult as making this cake gets, the finished cake *looks* waaaay more impressive than that. “upside-down” turns out to be a tip-off that something is going to look like it was difficult but actually be pretty easy.
in fact, arguably the most difficult part of this upside-down pear gingerbread cake is *not* eating the leftovers for breakfast the next morning…
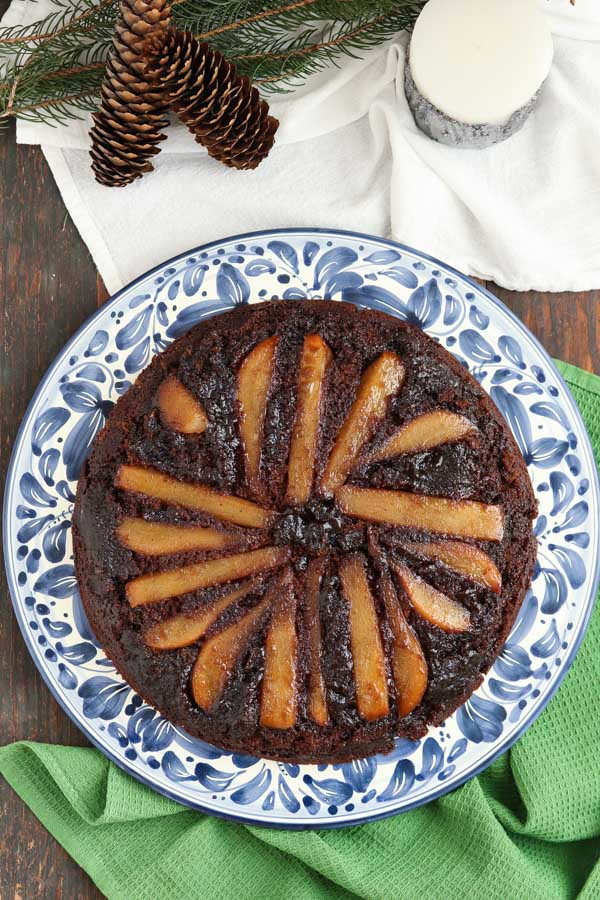
upside-down pear gingerbread cake
Ingredients
topping
- 2 – 3 firm but ripe pears (preferably bosc), see notes (2 is enough if your pears are very large)
- ½ stick (57 g. / 1/4 cup / 2 oz.) unsalted butter
- 160 g. (3/4 cup / 5 5/8 oz.) dark brown sugar
cake
- 300 g. (2 ½ cups / 10 ½ oz.) all purpose flour
- 1 ½ teaspoons baking soda
- 1 teaspoon ground cinnamon
- 1 teaspoon ground ginger
- ½ teaspoon ground cloves
- ¼ teaspoon salt
- 1 cup (240 ml / 8 oz.) mild molasses, see notes
- 1 cup (240 ml / 8 oz.) boiling water
- 1 stick (113 g. / ½ cup / 4 oz.) unsalted butter, softened
- 106 g. (½ cup packed / 3 ¾ oz.) dark brown sugar
- 1 large egg
- vanilla ice cream or whipped cream, for serving, if you like
Instructions
topping
- peel and core the pears, then cut each one into 8 wedges lengthwise. you need enough pears to arrange in a fan shape across the bottom of an oven safe 12” (30.5 cm) skillet, mostly covering the bottom of the pan. if you don’t have an oven safe skillet, you may be able to wrap the handle of your skillet in a double layer of aluminum foil, if that’s the only part that isn’t oven safe.
- in an oven safe 12” (30.5 cm) deep skillet set over medium-low heat, melt the butter. keep cooking the butter until the foam subsides, then sprinkle the brown sugar over the bottom of the skillet as evenly as possible. don’t touch the sugar once it’s in the pan, but do try to avoid dropping large clumps in. cook, undisturbed, for 3 minutes (all of the sugar will not have melted by this time, that’s ok). arrange the pears in the pan in a fan shape, as attractively as possible (skinny ends in the center, fatter parts on the outer edge). cook the pears, undisturbed, for 2 minutes, then remove the pan from the heat and set aside.
cake
- arrange a rack in the center position of the oven and preheat to 350° F.
- in a large bowl, combine the flour, baking soda, cinnamon, ginger, cloves, and salt and stir until everything is combined. in a 2 cup glass measuring cup or medium heat safe bowl, combine the molasses and boiling water; stir until thoroughly mixed.
- clear the counter around the mixer of anything you don’t want to have molasses splattered (no, i’m serious) and grab a splash guard/dish towel you don’t mind get molasses batter on.
- in the bowl of your electric mixer or a large mixing bowl, combine the butter, brown sugar, and egg. beat at medium speed (level 4 with a kitchenaid stand mixer) for about 2 minutes, until creamy. turn the mixer down to low (level 2 with a kitchenaid) and get your splash guard/towel in place. add the flour mixture and molasses mixture in 3 batches each, alternating between the two. no matter what you do, this is a runny batter and it will splash. add the molasses slowly to reduce splatters, but know that splatters are inevitable.
- gently pour the batter over the pears in the skillet, taking care not to disturb the pears.
- bake the cake for 40 – 50 minutes, just until a tester comes out clean. i’ve always found 40 minutes to be plenty, across a range of skillets, ovens, and years, so check yours on the early side.
- cool the cake in the pan for 5 minutes, then run a thin spatula around the edge to loosen the cake. set a large plate upside down over the skillet and then use pot holders to hold the skillet and plate together as you flip the whole thing right side up to release the cake.
- serve warm, with vanilla ice cream, if you like.
Notes
pears – to check for ripeness, press gently on the fruit next to the stem. the fruit should give only slightly and should feel just a bit softer than a russet potato. pears ripen from the inside out so by the time they are soft on the outside, the inside will be yuck (mealy and mushy).
i try to buy pears a few days in advance so they have time to ripen at room temperature over the course of a few days. if the pears need to ripen quickly, store them at room temperature in a paper bag with a ripe apple or banana, folded over to keep the bag closed. this allows the ethylene gas that the apple or banana is releasing to concentrate and be absorbed by the pear, causing it to ripen faster. stick to paper though, no plastic bags.
once the pears are ripe, take them out of the bag and transfer them to refrigerator, where they will last for a few days. and whether they are on the counter or in the fridge, keep the pears away from foods with a strong scent as the pears will absorb it.
(thank you cook’s illustrated and the kitchn for these pear tips!)
molasses – i have always made this with mild molasses. grandma’s brand is mild and readily available in most grocery stores.
adapted from gourmet’s upside-down pear gingerbread cake, which ran in the february 2002 issue.
please note this page contains affiliate links, which means that if you make a purchase after clicking from here, i will earn a small commission from amazon at no additional charge to you. i only link to products that i use and love. thank you for supporting tasty seasons!

 Save to BigOven
This cake is an excellent reason to acquire a big skillet. Seriously. The molasses flavor is unmistakable and also mellow; I kept taking bites because it was not only delicious but intriguing. YUM.
yay, i’m so glad you enjoyed the cake meredith! and i will say, i use my 12″ skillet nearly every night, though it’s highest calling is clearly this cake. 😉
Mine is in the oven right now!!!!
yessss! this makes me so happy to hear – thank you for telling me! i hope you love the cake! <3
happy new year!
Okay first a confession; I used canned pear halves and sliced them. I usually use canned pears for my pear almost tart, and I couldn’t find the really nice, ripe pears on short notice so I figured “what the heck”. The recipe itself was fairly simple and easy to follow. I did not have a skillet large enough, so I used a regular round cake pan and arranged my pears in first since they didn’t need to cook; then poured the brown sugar and butter over top of it. I didn’t plate the finished cake when it was still warm, so I had a little difficulty getting it out of the pan, but it looked beautiful on my cake stand after a tiny bit of repair. My husband, who is not much of a sweets person, exclaimed that it was the most delicious cake I’ve ever made. Our company loved it too! I love to cook, I love to bake, I love to try new recipes and I’m a pretty good cook. This is hands down a fabulous and tasty dessert that also has an elegant feel to it, despite the slight rustic look. Subtle ginger taste with the depth of molasses, adding in the texture of sweet pears. A winner that I will recommend and make again for sure!! I wish I could post my picture.
yay! i’m so glad you, your husband, and your guests enjoyed the cake, anne! thanks for sharing the modifications you made and how it turned out – that’s helpful for folks who make this recipe later. 🙂
i’d love to see your cake! post it on facebook, instagram, or twitter and tag me! (tasty_seasons on instagram and twitter, tastyseasons on facebook)